Keeping your NG tube clean is one of those tasks that seems simple but can cause real trouble if done wrong. Learning how to clean an NG tube properly isn’t just about hygiene; it’s about preventing infections, blockages, and unsafe feeding that can land you or a loved one back in the hospital.
Per ASPEN (American Society for Parenteral and Enteral Nutrition) guidelines, a nasogastric tube should be flushed with at least 30 mL of sterile or boiled water every four to six hours during continuous feeding. That frequency alone shows this is a routine that needs to be done right, every time. So let’s walk through the why, what, and how so you feel confident handling it.
Why Cleaning Your NG Tube the Right Way Matters
A nasogastric tube is a direct passage from the outside world into your stomach. Bacteria, food residue, and medication sediment can build up fast inside that narrow lumen. Over time, that buildup turns into biofilm, a slimy layer that clings to the tube wall and resists simple rinsing.
- Biofilm can block the tube entirely, making it impossible to deliver feed or medication.
- A partial blockage might not be obvious until you try to flush and feel resistance or hear gurgling sounds.
- Bacteria from biofilm can travel into the stomach, increasing the risk of infection, especially in people with weakened immune systems.
- Tube replacements are uncomfortable and costly. Keeping the tube clean extends its usable life.
The core idea is simple: clean frequently and thoroughly, and you avoid most of the common problems. Skip a day, and you’re rolling the dice.
What You’ll Need: Supplies for Safe NG Tube Cleaning
Before you start, gather everything. Having it all within arm’s reach means you won’t be rushing or skipping steps. Here’s the list:
| Item | Purpose | Notes |
|---|---|---|
| 60 mL catheter-tip syringe | Flushing water through the tube | Use a clean one each time; do not reuse |
| Sterile water or boiled (then cooled) water | For flushing | Tap water is only safe if patient is not immunocompromised and water quality is confirmed |
| Enteral tube cleaning brush | Scraping biofilm and residue inside the lumen | Choose a brush length that matches your tube; soft bristles only |
| pH test strips (range 1–6) | Verifying tube placement before flush | Target gastric pH ≤ 5.5 |
| Clean towel or gauze | Drying the external tube and skin site | Use a fresh one each session |
| Alcohol-based hand sanitizer or soap and water | Hand hygiene | Before and after handling the tube |
Most of these supplies are available through medical supply stores, home health agencies, or your healthcare provider. Check your insurance, some plans cover them under durable medical equipment.
Before You Start: Always Verify Tube Placement First
Never flush or feed through an NG tube until you are certain the tip is in the stomach. Misplaced tubes can send formula straight into the lungs, causing aspiration pneumonia. This is the single most dangerous mistake.
The standard bedside check: pH test of gastric aspirate.
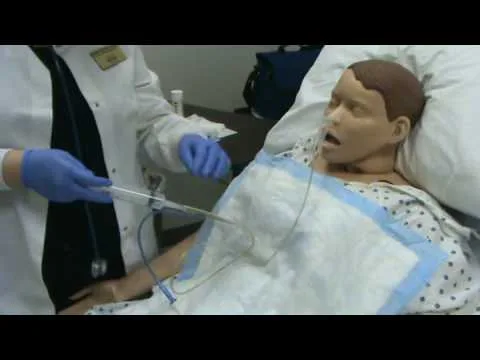
- Attach the syringe to the tube and gently pull back. You should get a small amount of stomach fluid (yellowish-green or clear).
- Put a drop on pH test paper.
- If the reading is ≤ 5.5, the tube is almost certainly in the stomach.
- If the pH is 6 or higher, the tube may be in the lung or intestine. Do not use it. Call the nurse or doctor.
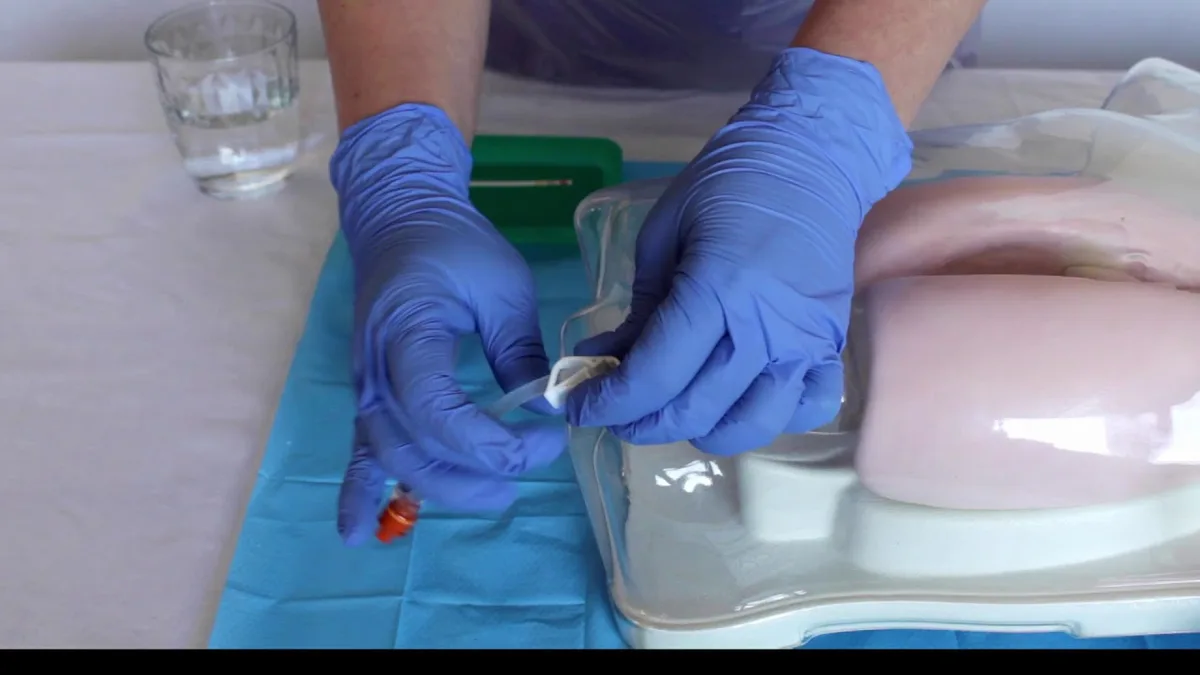
Why not just listen for air sounds? The “whoosh test” (injecting air and listening with a stethoscope) is no longer recommended by major nursing guidelines because it’s unreliable. Always trust the pH reading first. If you can’t get an aspirate at all, the tube may be kinked or the tip may be against the stomach wall, have a professional verify with an X-ray.
Step-by-Step: How to Clean a Nasogastric Tube
Cleaning the tube is a sequence you’ll repeat multiple times a day. Get the rhythm down, and it becomes second nature.
1. Wash your hands thoroughly with soap and water for at least 20 seconds. Dry with a clean towel.
2. Verify placement using the pH test described above. Document the result if you’re keeping a log.
3. Flush before and after each feed or medication.
- Fill the syringe with 30, 60 mL of sterile or boiled water (room temperature).
- Attach to the tube gently.
- Push the plunger slowly, a steady, gentle stream. Never force it.
- Remove the syringe and cap the tube.
4. Deep clean the inner lumen once daily (or if you notice resistance).
- Remove the cap and insert the tube cleaning brush all the way in.
- Rotate the brush gently as you pull it back out. This dislodges biofilm.
- Follow up with a 30 mL flush to rinse out loosened debris.
5. Clean the outside of the tube and the skin around it.
- Wipe the external length of the tube with a clean, damp cloth or a mild soapy wipe.
- Pat dry with a clean towel.
- Check the nares for irritation or redness.
6. Secure the tube with medical tape or a tube holder. Make sure it’s not pulling on the nostril.
Frequency guide:
- Continuous feeds: Flush every 4, 6 hours. Deep clean once every 24 hours.
- Bolus feeds: Flush before and after each feeding. Deep clean once daily.
- Medications only: Flush before and after each dose. Deep clean every other day.
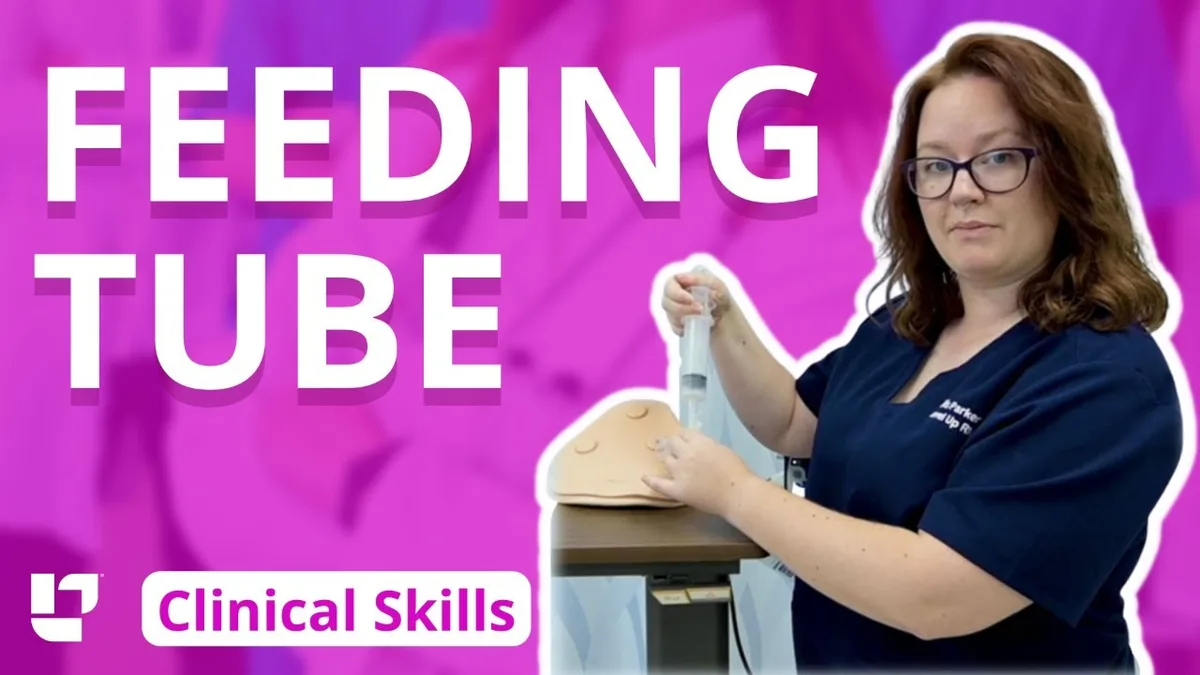
If you’re caring for someone with a PEG tube as well, many of the same cleaning principles apply. We cover that step by step in our guide on using a dedicated cleaning brush.
Common Mistakes That Can Lead to Blockage or Infection
Even with the best intentions, caregivers slip into habits that cause problems. Here are the biggest ones to avoid.
Using soda or fruit juice to flush. Old “folk remedy” advice says cranberry juice or cola can dissolve clogs. That’s not true, and acidic liquids can damage the tube material and irritate the stomach lining. Stick to water or normal saline.
Flushing too fast or with cold water. Cold water can cause cramping. Rapid flushing can force fluid into the lungs if the tube is misplaced. Always use room-temperature water and push slowly.
Skipping the placement check between flushes. It’s tempting to skip pH testing if the tube hasn’t moved. But tubes can migrate, especially if the patient coughs or vomits. Always check before every feeding.
Reusing syringes or brushes. Single-use items are designed for one session. Using them again introduces bacteria from the last flush. Use a fresh syringe each time and replace the brush according to manufacturer recommendations (usually every 1, 2 weeks).
Ignoring early signs of blockage. If you feel resistance when flushing, don’t just push harder. Try a warm water soak for 15 minutes, then attempt to flush again. If it doesn’t clear, call for help.
Forcing a blocked tube can damage it or the patient.
Not cleaning the external skin site. Bacteria around the nares can travel down the tube. Clean the nostrils gently with a saline-soaked cotton swab during your daily routine. Keep an eye out for redness, crusting, or discharge.
How to Unclog a Blocked NG Tube
A clogged tube is frustrating, but it’s almost always preventable with consistent cleaning. If you feel resistance when flushing, stop pushing. Forcing a blockage can damage the tube or injure the stomach lining.
Try the warm water soak method first.
- Fill the syringe with 30 mL of warm (not hot) sterile or boiled water.
- Attach to the tube and gently pull back on the plunger to create suction. Hold for 30 seconds.
- Release and let the water flow in naturally. Repeat three to four times.
- If the water still won’t pass, cap the tube and let the water sit inside for 15 minutes. Then try again.
If the soak doesn’t work, use a tube cleaning brush. Insert it gently and rotate as you withdraw. Follow with another warm water flush.
Do not use wire brushes or anything sharp, they can puncture the tube.
When to call for help. If the tube stays clogged after two attempts at soaking and brushing, it’s time to ask a nurse or doctor. They may use a declogging solution (enzymatic or bicarbonate-based) or replace the tube entirely. Never try to unclog with a guidewire or a stiff object.
The risks of perforation are real.
Risks You Need to Know (and How to Avoid Them)
Cleaning an NG tube isn’t risk-free. Even the best caregiver can make a mistake that leads to a serious complication. Here are the ones to watch for.
Aspiration pneumonia. This is the biggest danger. It happens when formula or flush water goes into the lungs instead of the stomach. The only reliable prevention is verifying placement with a pH test before every feeding.
The “whoosh test” is not enough.
Infection from contaminated water. Tap water contains bacteria that are harmless to healthy people but dangerous for someone with a compromised immune system. Use sterile or boiled (then cooled) water for all flushes. The CDC recommends sterile water for immunocompromised patients.
Electrolyte imbalances. Flushing with plain water too often can dilute sodium and potassium levels. For patients on long-term tube feeding, some doctors recommend normal saline (0.9% sodium chloride) for half the daily flushes. Check with the care team.
Skin breakdown at the nares. The tube rubs against the nostril constantly. Clean the skin gently with saline-soaked gauze each day. Apply a barrier cream if the area looks red or dry.
Rotate the tape position slightly to change pressure points.
Tube migration. If the tube moves out of place, feeding can go into the lung. Secure the tube well with tape or a commercial tube holder. Mark the insertion length with a permanent marker so you can quickly spot if it’s moved.
Cleaning Differences: Feeding Tubes vs. Decompression Tubes
Not all NG tubes are the same. The cleaning routine changes depending on whether you’re using a feeding tube or a decompression tube.
Feeding tubes (like Dobhoff or polyurethane single-lumen tubes). These are used for enteral nutrition. They are narrow (8, 12 Fr) and flexible. Cleaning is straightforward: flush with water, brush the lumen, wipe the exterior.
The main risk is clogging from thick formula or crushed medications.
Decompression tubes (like Levin or Salem sump tubes). These are larger (14, 18 Fr) and used to drain stomach contents after surgery. They have a double lumen or a vent port.
| Feature | Feeding tube | Decompression tube |
|---|---|---|
| Typical size | 8–12 Fr | 14–18 Fr |
| Primary use | Deliver nutrition | Drain stomach contents |
| Lumen type | Single (usually) | Single (Levin) or double (Salem sump) |
| Cleaning focus | Preventing clog from formula | Preventing clog from mucus or blood |
| Vent port | None | Blue air vent (do not clamp or flush) |
Important for Salem sump tubes. The blue air vent is not a feeding port. Never flush it or clamp it. It allows air to enter the stomach so the main lumen can drain freely.
Clamping it can cause negative pressure and damage the stomach lining. When cleaning, wipe the vent with a damp cloth but do not insert a brush.
When to Replace the Tube Instead of Just Cleaning
Cleaning extends the life of the tube, but every tube has a shelf life. Manufacturer guidelines typically recommend replacing polyurethane tubes every 30 days and silicone tubes every 90 days. Check the package insert for your specific brand.
Signs that a tube needs replacing sooner:
- The tube feels stiff or brittle when you bend it.
- Cracks or splits visible near the connector hub.
- Persistent clogging even after thorough cleaning.
- The tube has been in place longer than the recommended time.
- You notice blood or dark coffee-ground material in the aspirate (could mean irritation or erosion).
If you see any of these, stop using the tube and call the healthcare provider. Do not try to patch a cracked tube. A small crack can allow bacteria in or cause a leak during feeding.
After a failed declogging attempt. If you tried warm water and a brush twice and the tube won’t clear, replacement is usually the safest option. Continuing to push pressure on a stubborn clog risks rupture.
Pro Tips for Caregivers: Making the Routine Easier
Caring for someone with an NG tube is demanding. A few small habits can make the daily cleaning less stressful.
Keep a cleaning log. Write down the time of each flush, the pH result, and any resistance felt. This helps you spot patterns early. It also gives the nurse clear data if problems develop.
Set phone alarms for flush times. It’s easy to get distracted. A recurring alarm every four to six hours keeps you on track. Add a separate alarm for the daily deep clean.
Pre-fill syringes for the day. Fill several syringes with the correct amount of sterile or boiled water and cap them. Keep them at room temperature. This saves time and reduces the chance of rushing.
Have a backup tube kit. Ask the provider for a spare tube and keep it in a clean, dry place. If the tube fails, you don’t want to wait for a delivery. Also keep spare tape, pH strips, and a backup syringe.
Learn the signs of trouble early. Monitor the patient’s temperature daily. Report any fever, vomiting, or coughing during feeding. Those are red flags that need professional attention.
Don’t hesitate to ask for help. Home caregivers often feel they should manage everything alone. But nurses and dietitians are there to support you. Call them if you’re unsure about any step.
We cover specific brush cleaning techniques in our guide on how to use a PEG tube cleaning brush, which shares many of the same principles as NG tube care.
When to Call a Doctor or Nurse
Some situations go beyond what you can handle at home. Don’t wait to call for help if you see any of these warning signs.
Fever or chills. A temperature above 100.4°F (38°C) could indicate an infection. Stop using the tube and call the provider immediately.
Blood in the aspirate. A small amount of pink-tinged fluid is sometimes normal from minor irritation. But bright red blood or dark coffee-ground material means something more serious.
Inability to flush or aspirate. If the tube is completely blocked after two attempted declogs, trying again risks rupture. Call for guidance or a replacement tube.
Vomiting or coughing during feeding. This could mean the tube has moved out of place. Stop the feed, check the pH, and do not resume until a professional has verified placement.
Tube dislodgement. If the tube comes out partially or fully, do not try to push it back in. That can damage tissue. Cover the insertion site with gauze and call for instructions.
Redness, swelling, or pus at the nares. Those are signs of skin infection or sinusitis. The provider may need to change the tape position or prescribe a topical antibiotic.
Our research shows that early intervention in these cases prevents more serious complications. As the CDC recommends for any medical device, immediate reporting of unusual symptoms reduces infection risk.
Quick Reference: Daily Cleaning Checklist
Print this out or save it on your phone. Check off each step every time you clean.
Every flush (before and after feed or med):
- Wash hands for 20 seconds
- Check tube placement with pH test (target ≤ 5.5)
- Flush with 30, 60 mL sterile/boiled water at room temperature
- Push slowly, no force
- Cap tube after flushing
Daily deep clean (once per 24 hours):
- All flush steps above
- Insert tube cleaning brush, rotate gently, withdraw
- Flush again with 30 mL water
- Wipe exterior tube with clean damp cloth
- Clean nares and skin around tube with saline gauze
- Inspect tube for cracks, stiffness, or discoloration
- Document time, pH result, and any issues
Weekly checks:
- Check tube insertion length against original mark
- Replace brush if bristles are bent or dirty
- Stock up on sterile water, syringes, pH strips
- Review manufacturer instructions for tube replacement date
This routine takes under 10 minutes when you get the hang of it. A consistent schedule prevents most problems before they start.
Frequently Asked Questions
Can I use tap water to flush an NG tube?
Only if the patient has a healthy immune system and your local water meets safety standards. For immunocompromised patients or those on acid-suppressing medications, use sterile water or water boiled for five minutes and cooled. The CDC recommends sterile water for these populations.
How often should I replace the tube cleaning brush?
Replace the brush every 1 to 2 weeks or sooner if the bristles look bent or soiled. A worn brush won’t remove biofilm effectively. Store it in a clean, dry place between uses.
What should I do if the tube won’t flush after a clog?
Stop immediately. Try the warm water soak method: fill the tube with 30 mL of warm water and wait 15 minutes. If that doesn’t work, use a tube cleaning brush.
If it still won’t flush, call the healthcare provider. Do not use sharp objects or high pressure.
Is it safe to crush pills and put them through the tube?
Only if the medication is approved for crushing. Some pills are extended-release or coated and can clog the tube or change how the drug works. Always check with a pharmacist first.
Crush pills to a fine powder and mix with water before flushing.
Can I reuse a syringe for flushing?
No. Syringes are single-use items. Reusing them introduces bacteria from the previous flush.
Use a fresh, sterile syringe each time. Your insurance or home health provider should supply enough for your routine.
How do I clean the tube if the patient is on continuous feeding?
Flush every 4 to 6 hours even during continuous feeding pauses. Use a syringe to flush with 30 mL of water. Perform a deep clean with a brush once every 24 hours.
For pump systems, follow the manufacturer’s instructions for cleaning the pump tubing as well.