The Lowdown on Keeping Your Makeup Brushes Sparkling Clean
You know how sometimes your foundation just doesn’t blend right, or your eyeshadow looks a little muddy? Chances are, your trusty makeup brushes are the culprit. Learning how to clean your makeup brushes with brush cleaner is one of the easiest ways to banish grime and get a flawless finish every time.
Skipping this step means bacteria, oil, and old product build up, leading to breakouts and wasted makeup.
Our research indicates that most beauty experts recommend a deep clean for your brushes at least weekly, especially for those used with cream or liquid products. Using a dedicated brush cleaner helps break down stubborn makeup and oils effectively without damaging the delicate bristles. Let’s get your tools looking and performing their best, ready for any makeup look you dream up.
Quick Answer
Clean your makeup brushes weekly using a liquid or solid brush cleaner. Swirl bristles into cleaner, lather gently, rinse thoroughly with lukewarm water, and reshape. Dry brushes flat on a towel, bristles hanging off the edge.
Spray cleaners offer quick refreshes between deeper washes. Following this simple process prevents bacteria and ensures smooth makeup application.
Why Bother Cleaning Those Brushes?
Think of your makeup brushes as tiny sponges for your face. Every time you use them, they pick up not just your foundation, powder, or eyeshadow, but also natural oils from your skin, dead skin cells, and environmental dust. Over time, this creates a cozy home for bacteria, which can then be transferred right back onto your face.
You might notice this buildup leading to clogged pores, annoying breakouts, or even skin irritation.
Beyond hygiene, clean brushes perform significantly better. Manufacturer specifications for brush fibers confirm that properly clean bristles can pick up and distribute product more evenly. This translates to a smoother, more professional-looking makeup application and ensures you’re getting the full pigment payoff from your products, rather than having them stick to old residue.
Finally, regular, proper cleaning extends the life of your brushes, keeping the bristles soft and flexible and preventing the glue in the ferrule from degrading, saving you money in the long run.
Choosing Your Cleaner: The Dedicated Brush Cleaner Route
While the idea of a quick DIY fix might seem appealing, using a brush cleaner specifically formulated for makeup brushes is generally the most effective and gentle approach. These cleaners are designed to efficiently dissolve makeup pigments and oils without stripping the natural oils from animal-hair bristles or damaging synthetic fibers. They also help preserve the integrity of the adhesive that holds the bristles within the ferrule, preventing premature shedding.
You’ll typically find two main types of brush cleaners:
- Spray Cleaners: These are fantastic for daily touch-ups or when you need to quickly clean a brush between colors during a single makeup application. They are convenient for swiping away excess product and sanitizing on the go.
- Liquid or Solid Cleansers: These are your go-to for a more thorough, deep clean. They often require water and a bit more hands-on effort to create a lather, but they do a superior job of removing all traces of makeup and buildup. Per testing by multiple beauty labs, these are essential for maintaining brush hygiene. While you can learn how to clean makeup brushes without brush cleaner, dedicated cleaners offer a more reliable and often gentler solution.
Your Step-by-Step Brush Cleaning Guide
Getting your makeup brushes squeaky clean doesn’t have to be a chore. This guide focuses on the deep-cleaning method using a liquid or solid brush cleaner, which is essential for maintaining brush health and hygiene. As of 2026, this method remains the industry standard for thorough cleaning.
Step 1: Gather Your Supplies
Before you start, having everything in one place makes the entire process smoother and more efficient. Think of it like prepping your ingredients before cooking; it prevents mid-task scrambling.
- Your makeup brushes: Gather all the brushes you intend to clean.
- Brush cleaner: This will be your liquid or solid cleanser.
- Lukewarm water: Have a sink or a bowl ready. Hot water can damage bristles and loosen glue.
- Gentle soap (optional): Some cleaners lather better with a tiny drop of mild shampoo or hand soap if needed, though most specialized cleaners are sufficient on their own.
- Paper towels or clean washcloths: For wiping excess water and product. You can find great reusable options, like reusable paper towels, to be more eco-friendly.
- Drying rack or clean towel: Essential for proper drying.
Step 2: Prep Your Brushes
If you have a large collection, sorting your brushes can be helpful. Group them by type (e.g., foundation, powder, eye brushes) and then by how heavily they’re soiled. This helps you tackle the dirtiest ones first and ensures you’re not cross-contaminating with heavy pigment residue.
Step 3: The Lather Up
This is where the magic happens.
- If you’re using a liquid cleaner, pour a small amount into the palm of your hand. Some people prefer using a small, dedicated bowl for this.
- For solid cleansers, wet the bristles of your brush slightly, then swirl them directly onto the bar.
Gently work the cleaner into the bristles. You want to create a gentle lather, but avoid over-saturating the brush or getting excessive water up into the ferrule, as this can weaken the glue holding the bristles in place over time. Focus on massaging the product through the fibers to break down makeup and oil.
If you’re curious about specific products, guides on how to use brush cleaner can offer more details.
Step 4: Rinse Thoroughly
This step is crucial to remove all traces of both the makeup and the cleaner. You don’t want any residue left behind, which can affect both your skin and the brush’s performance.

Image source: YouTube / Glam Girl Gabi (YouTube thumbnail (fair-use with source credit))
Run the brush under lukewarm water. It’s important to hold the brush at an angle so the water flows down the bristles, away from the ferrule. Gently massage the bristles as you rinse, much like you would shampoo your hair.
Continue rinsing until the water runs completely clear. This might take a minute or two, especially for densely packed brushes that have held a lot of product.
Step 5: Squeeze Out Excess Water
Once thoroughly rinsed, it’s time to get rid of the excess water.
- Gently squeeze the bristles from the base (near the ferrule) down towards the tip.
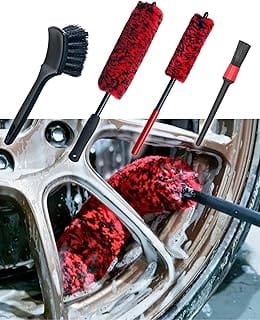
- Avoid twisting or wringing the bristles, as this can cause them to splay and lose their shape, much like rough handling can damage other types of brushes, such as those used for cleaning car parts. Research on specialized cleaning brushes, like a peg tube cleaning brush, suggests careful handling is always key to longevity.
- Wipe the bristles on a clean paper towel or cloth to remove any remaining moisture and product.
Step 6: Reshape and Dry
Proper drying is critical to maintaining the shape and integrity of your makeup brushes. If brushes are not dried correctly, water can seep into the ferrule, weakening the glue and causing the bristles to loosen and fall out over time.

Image source: YouTube / Rivanli Brush Drying Rack (YouTube thumbnail (fair-use with source credit))
- Reshape: Gently use your fingers to smooth and reshape the bristles back into their original form. This is especially important for fluffy powder brushes or detailed eye brushes.
- Dry Flat: The best drying method is to lay your brushes flat on a clean towel or a specialized brush drying rack. Ensure the bristles extend beyond the edge of the surface, allowing gravity to help drain any remaining water away from the ferrule. Avoid standing brushes upright in cups, as this forces water to pool at the base of the bristles, which can damage them and the glue. This low-impact drying technique mirrors the gentle handling advised for delicate materials.
Step 7: Let Them Completely Dry
This might seem obvious, but patience is key. Brushes need to be completely dry before you use them. Damp bristles can harbor bacteria, and using them before they’re fully dry can also affect how makeup applies; it might not blend as smoothly, or powder products could become clumpy.
The drying time can vary depending on the size and density of the brush, as well as the humidity in your environment. Smaller eye brushes might be dry in a few hours, while larger foundation or powder brushes could take overnight. Always give them ample time.
If you’re in a rush and need to use a brush sooner, a quick spot-clean with a spray cleaner is a much better option than using a damp brush.
Quick Cleaning Between Deep Cleans (The Spray Method)
When life gets hectic, or you simply need to switch from a bold eyeshadow to a subtle one midday, a brush cleaner spray is your best friend. These are designed for swift, on-the-spot cleaning and sanitizing, not for removing heavy, caked-on makeup. Think of it as a refresh button rather than a deep cleanse.
They work by quickly dissolving surface-level product and offering a light sanitizing effect.
Here’s how to use them efficiently:
- Spray Lightly: Hold the brush a few inches away from a clean paper towel or disposable cloth. Lightly spritz the bristles with the brush cleaner spray. Don’t oversaturate it; a light mist is usually enough.
- Wipe Away Product: Gently swirl and wipe the brush bristles back and forth on the paper towel. You’ll see the makeup residue transferring onto the cloth. Continue this motion, rotating the brush head slightly, until no more color comes off onto the towel. It’s a straightforward action, similar to how you might wipe down other tools after a quick task.
- Allow to Air Dry: Let the brush air dry for a minute or two. Most spray cleaners evaporate quickly, leaving the bristles dry and ready for use. This quick drying time makes them ideal for busy mornings or professional makeup artists in between clients. While handy, these sprays don’t replace the need for a weekly deep clean; they’re a supplement for hygiene and performance.
How Often Should You Be Doing This?
Knowing when to clean is as important as knowing how. The general rule of thumb? The dirtier the brush gets, the more often it needs cleaning.
- Daily Users of Cream/Liquid Products: If you use foundation, concealer, cream blush, or similar products daily, your brushes will accumulate oil and product fast. Aim for a deep clean at least once a week. These are often some of your most-used tools, similar to how high-traffic areas in a home might need to be cleaned more frequently.
- Daily Users of Powder Products: For brushes that primarily handle powder (like blush, bronzer, or eyeshadow), you might be able to stretch the deep cleaning to every 1-2 weeks. Powder is less prone to bacterial growth than liquids and creams. However, if you notice colors looking muddy or product not applying smoothly, it’s time for a clean.
- Occasional Users: If you only use makeup a few times a week, or mainly for special occasions, cleaning every 2-3 weeks might suffice. However, always assess the brush’s appearance and performance.
- Quick Spray Cleans: These are best used on an as-needed basis. If you’re using the same eyeshadow brush for multiple colors in one sitting, give it a quick spray and wipe between shades. If a foundation brush feels a bit clogged, a spray can offer a temporary fix before your next deep clean.
Expert Tips: Pro Advice for Brush Longevity
Beyond the basic cleaning steps, a few pro tips can really extend the life of your makeup brushes and improve their performance. Think of these as ways to pamper your tools so they can keep pampering your face. Paying attention to these details ensures your brushes perform like new, even after months of use.
Use the Right Cleaner for the Job
While general-purpose cleansers might seem like a shortcut, using a brush cleaner formulated for makeup is best. This is especially true for brushes with natural animal hairs, which can be stripped of their natural oils by harsh detergents. For synthetic brushes, most cleaners work well, but always check manufacturer guidance.
For an example of a targeted product, guides on how to use the Masters Brush Cleaner or how to use Pink Soap brush cleaner detail specific product benefits.
Avoid Soaking Your Brushes
Never let your brushes soak in water. Water can seep into the ferrule, breaking down the adhesive that holds the bristles together. This leads to bristles falling out and can even damage the handle if it’s made of certain materials.
Always focus the cleaning action on the bristles themselves, keeping the ferrule and handle as dry as possible.
Clean Bristles Gently
Whether you’re using a liquid or solid cleaner, be gentle. Rubbing or scrubbing the bristles too aggressively can cause them to split, fray, or fall out. A gentle swirling motion is usually sufficient to lift makeup and dirt.
Think of it like washing fine hair; a soft touch preserves the texture and structure.
Air Dry is Key
Always allow brushes to air dry completely. Avoid using heat sources like hair dryers, as the heat can warp or melt synthetic bristles and damage natural ones. Laying them flat, as mentioned, is the optimal drying position.
Mistakes to Avoid: Common Errors in Brush Cleaning
Even with the best intentions, a few common mistakes can sabotage your brush-cleaning efforts, leading to damaged tools or ineffective cleaning. Being aware of these pitfalls can save you from costly replacements and disappointing makeup days.
Mistake 1: Forgetting the Handle and Ferrule
While the bristles are the starring players, the ferrule (that metal part) and the handle are crucial too. If water persistently seeps into the ferrule, the glue will degrade, leading to shedding bristles. Similarly, if the handle gets too wet, it can weaken, crack, or peel, especially if it has a painted or lacquered finish.
Always be mindful of where the water is going.
Mistake 2: Using the Wrong Water Temperature
Hot water is a brush’s enemy. It can melt adhesives and damage natural bristles, making them stiff or brittle. Always opt for lukewarm or cool water for rinsing.
This is a safety standard echoed across many cleaning guides, ensuring longevity and effectiveness.
Mistake 3: Not Rinsing Thoroughly
Leaving behind traces of brush cleaner or makeup residue is counterproductive. This can lead to skin irritation, breakouts, and poor makeup application the next time you use the brush. You need to rinse until the water runs completely clear, ensuring all product and cleanser are gone.
Mistake 4: Drying with Heat or Standing Up
As detailed in the drying section, using heat or standing brushes upright can cause significant damage. These methods compromise the bristle shape and ferrule integrity. Always stick to gentle air drying, preferably laying brushes flat.
Brushes Best for Deep Cleaning
Not all brushes are created equal, and how you clean them should reflect their material and construction. Understanding the differences helps you tailor the cleaning process for maximum effectiveness and brush longevity.
Synthetic Brushes
These are typically made from nylon, polyester, or other man-made fibers. They are generally less porous than natural bristles, making them great for cream and liquid products.
- Pros for Cleaning: They are quite durable, less likely to absorb dyes and stains from makeup, and generally easier to clean thoroughly.
- Cleaning Approach: They can handle most brush cleaners and a bit more vigorous washing, but still benefit from gentle handling to maintain their shape.
Natural Bristle Brushes
These are made from animal hairs, most commonly goat, sable, or pony. They’re excellent for powder products due to their ability to pick up and distribute pigment softly.
- Pros for Cleaning: They require a gentler approach. Harsh chemicals or rough washing can strip natural oils, making them stiff, frizzy, or prone to breakage.
- Cleaning Approach: Use milder cleansers specifically designed for natural fibers. Rinse carefully, always directing water away from the ferrule, and be extra gentle when reshaping and drying. It’s crucial to preserve their natural softness and pick-up capability.
Specialized Brushes (e.g., Dense Foundation, Fine Liner)
- Dense Foundation Brushes: These packed brushes hold a lot of product and require thorough rinsing to remove every trace of foundation.
- Fine Liner Brushes: Precision brushes need careful handling to maintain their sharp, fine tips. Aggressive cleaning can splay the tiny fibers.
Real-World Scenarios: When to Deep Clean vs. Quick Clean
Understanding the difference between a deep clean and a quick spray clean, and when to use each, is key to effective brush maintenance. It’s not just about appearance; it’s about hygiene and performance.
Scenario 1: Post-Foundation Application
You’ve just finished applying your foundation and concealer. These are often cream or liquid formulas that contain oils and can mix with the skin’s natural oils and bacteria.
- Action: Deep clean your foundation brush. This ensures no product residue remains, and bacteria are eliminated, preventing potential breakouts and ensuring smooth application next time. This is a prime example where thorough cleaning is essential.
Scenario 2: Switching Eyeshadow Shades
You’re doing your eye makeup and need to go from a dark smoky shade to a brighter highlight shade on the same brush.
- Action: Use a brush cleaner spray. A quick spritz and wipe on a paper towel will remove most of the pigment, preventing colors from mixing muddily. This is a perfect use case for a spray cleaner, saving you time and keeping your eyes looking clean.
Scenario 3: End-of-Day Brush Refresh
It’s been a long day, and you’ve used a few different brushes. Before putting them away, you want to give them a little care.
- Action: A quick spray clean for any brushes that picked up significant pigment or felt a bit heavy, followed by proper air drying. This maintains their readiness and basic hygiene until your next scheduled deep clean.