You’ve polished a table before. Maybe you wiped on some spray, buffed it with a rag, and called it done. And maybe it looked great for about three days before it got sticky or dull again.
That’s because knowing how to polish wood furniture isn’t just about grabbing any bottle off the shelf and rubbing it in. It’s about matching the right product to the right finish and applying it the way that actually works.
Here’s the thing most people miss: the finish on your furniture decides everything. A single coat of polyurethane behaves completely differently than shellac or an oiled surface. Per ASTM testing standards, a paste wax applied to the wrong finish can cloud up within weeks.
Get it right, and that side table stays rich for months. Get it wrong, and you’re stripping residue off the whole piece. Let’s walk through what actually matters.
Quick Answer
Clean the surface first with a mild soap or mineral spirits. Test your finish type with alcohol or acetone. Apply a thin coat of paste wax or polish.
Let it haze for 10 to 20 minutes. Buff with a clean, dry microfiber cloth. Repeat only if needed.
Polish every three to six months for best results.
Why Polishing Wood Furniture Is Trickier Than It Looks
Most people think polishing is just rubbing stuff on wood until it shines. That works sometimes. But it also causes plenty of headaches you’ve probably dealt with.
The main problem is buildup. Spray polishes from the grocery store often contain silicone. They give you that instant shine, then they keep building up layer after layer. After a few years, your furniture has this cloudy, sticky film that’s hard to remove.
You can’t just polish over it. You have to strip it.
The second problem is mismatched products. Put an oil-based polish on a lacquered table, and it sits on top like grease on glass. It never soaks in. It just smears around and attracts dust.
Put a wax on top of an oil finish, and it beads up instead of bonding. Each finish type needs its own approach.
Then there’s the technique problem. Most people apply too much product. They glop it on, then buff it off, and wonder why it feels tacky the next day. The right amount looks like almost nothing is going on.
A paper-thin layer is all you need.
And finally, people skip the cleaning step. Dust and grime get ground into the finish when you polish over them. You get swirl marks and a dull haze instead of a clean shine. A quick wipe with a tack cloth or a damp microfiber fixes that before you start.
Here’s what our research shows: most furniture doesn’t need frequent polishing. It needs proper cleaning and an occasional protective layer. Over-polishing is actually more common than under-polishing.
So let’s figure out what you’re working with first.
First Things First: Know What You’re Working With
Before you buy anything, you need to identify the finish on your furniture. This is the step everyone skips. And it’s the step that determines everything else.
There are four common finish types on household furniture. Each one reacts differently to polish, wax, and cleaners.
Varnish or polyurethane. These are hard, clear coatings that form a plastic-like layer on top of the wood. They’re common on modern furniture, dining tables, and kitchen cabinets. Water beads up on them.
They feel smooth and slightly cool to the touch.
Lacquer. This is a thin, fast-drying finish often used on mass-produced furniture from the mid-20th century. It’s harder than varnish but more brittle. You’ll find it on antique reproductions and some modern pieces.
Shellac. This is an old-school natural finish made from beetle secretions. It’s common on antique furniture and some high-end reproductions. It’s soft, warm to the touch, and sensitive to alcohol and water.
Oil finishes (tung oil, Danish oil, linseed oil). These soak into the wood rather than sitting on top. They leave a natural, matte look with no glossy film. You’ll find them on butcher blocks, cutting boards, and some handmade furniture.
Wax finishes. Sometimes wax is the finish itself, not just a top coat. Beeswax or carnauba wax applied directly to bare wood creates a soft, low-sheen surface. It needs reapplication every few months.
The Alcohol Test (For Shellac)
Grab a cotton swab or a clean cloth. Dab it with rubbing alcohol (isopropyl, 70% or higher). Rub it gently on an inconspicuous spot, like the underside of a table or inside a drawer.
If the finish softens or dissolves, you’ve got shellac. That’s important because shellac is alcohol-soluble. Many commercial polishes contain alcohol and will damage it.
If nothing happens, move to the next test.
The Acetone Test (For Lacquer)
Use a drop of acetone (nail polish remover works). Dab it on the same hidden area.
If the finish softens or becomes tacky, it’s lacquer. Lacquer is sensitive to strong solvents. Avoid oil-based polishes on lacquer.
They can cloud the surface.
If neither alcohol nor acetone affects the finish, you’re dealing with varnish, polyurethane, or an oil finish.
The Scratch Test (For Varnish or Polyurethane)
Take a coin or your fingernail. Gently scratch a hidden area.
If the finish feels hard and the scratch leaves a white mark, it’s varnish or polyurethane. These are the toughest finishes. They resist most polishes and cleaners.
If the scratch reveals raw wood underneath and the finish feels softer, it might be an oil finish. Oil finishes don’t form a thick film. They soak in.
Scratching them just exposes the bare wood.
Once you know your finish type, you can pick the right polish. And you can avoid damaging that expensive dining table.
What You Actually Need: Tools and Materials
You don’t need much. But the few things you do need matter more than you’d think.
Microfiber cloths. These are non-negotiable. Cotton rags and old t-shirts leave lint. Paper towels leave fibers and scratches.
Microfiber picks up dust and applies polish evenly without shedding. Buy a pack of at least four. You’ll use one for dusting, one for applying, one for buffing, and one for final shine.
Tack cloth. This is a sticky cloth used to pick up fine dust after sanding or cleaning. It’s cheap and saves you from re-dusting. A single tack cloth costs about a dollar and lasts for several uses.
Mineral spirits. This is your go-to cleaner for removing old wax, silicone buildup, and grime. It evaporates cleanly without leaving residue. Use it before polishing if the surface looks dull or feels sticky.
Steel wool (#0000 fine grade). This is for light cleaning and smoothing, not for scrubbing. The extra-fine grade won’t scratch most finishes. Use it with mineral spirits to gently remove old wax or light oxidation.
Paste wax or polish. This is where you have choices. More on that below.
Applicator pad or soft cloth. Some people use a foam brush or a dedicated wax applicator. A clean microfiber cloth works fine.
The Right Cloth Makes a Difference
Not all cloths are created equal. Microfiber with a 300 to 400 GSM weight works best. It’s dense enough to hold polish without dripping, and soft enough to buff without scratching.
Avoid paper towels at all costs. They contain wood fibers that can leave micro-scratches on glossy finishes over time.
Used cotton t-shirts are okay in a pinch, but only if they’re washed without fabric softener. Softener residues transfer to the wood and cloud the finish.
Steel Wool: When and How to Use It
Steel wool is useful but dangerous if used wrong. Only use #0000 grade (extra fine). Anything coarser will scratch the finish.
Use it wet with mineral spirits or a mild soap solution. Dry steel wool sheds tiny metal fibers that rust if left on the surface. Always vacuum or wipe thoroughly after using it.
Steel wool is great for removing old wax buildup, leveling minor drips or dust nibs, and lightly dulling glossy finishes before applying new wax.
Do not use steel wool on oil finishes. The fibers can get embedded in the wood and rust over time.
Polishes vs. Waxes vs. Oils: What’s the Difference?
This is where most confusion happens. Let’s break it down clearly.
| Product Type | What It Does | Best For | How Often |
|---|---|---|---|
| Spray polish (lemon oil, etc.) | Adds shine and some dust protection, but mostly silicone and fragrance | Quick touch-ups on polyurethane finishes | Every few weeks |
| Paste wax (beeswax, carnauba) | Forms a thin protective layer that seals and shines | Varnish, lacquer, and shellac finishes | Every 3-6 months |
| Liquid wax | Similar to paste wax but thinner and easier to apply | Same as paste wax, but less durable | Every 2-3 months |
| Oil (tung, Danish, lemon) | Penetrates the wood to nourish and protect | Unfinished or oil-finished wood | Every 6-12 months |
| Furniture cream | Blend of wax and oil in a creamy base | Most finished wood surfaces | Every 3-4 months |
Spray polishes are convenient but they’re mostly silicone and fragrance. The silicone builds up over time and makes refinishing difficult later. Paste wax gives you a genuine protective layer without the buildup problem.
If you only buy one product, get a good paste wax. It works on most finishes, lasts longer, and doesn’t leave sticky residue.
The Step-by-Step Process (With Visual Cues)
Now let’s go through the actual process. Follow these steps in order, and you’ll get consistent results.
Step 1: Clean, Don’t Just Dust
Start with a clean surface. Dusting alone isn’t enough. You need to remove grease, oils, and old polish residue.
Wipe the surface with a microfiber cloth lightly dampened with water and a drop of mild dish soap. Wring it out well. You want damp, not wet.
Wet wood and water-based finishes don’t mix.
Let the surface dry completely. This takes about 10 to 15 minutes.
If the surface feels sticky or cloudy, use mineral spirits instead of soap and water. Apply it with a clean cloth, wipe gently, and let it evaporate. Mineral spirits won’t damage most finishes.
Visual cue: A clean surface looks uniform. There’s no greasy residue or dull patches. Water beads evenly rather than soaking in or sitting in spots.
Step 2: Apply in Thin Coats Only
This is the most important rule. Thin coats. Always.
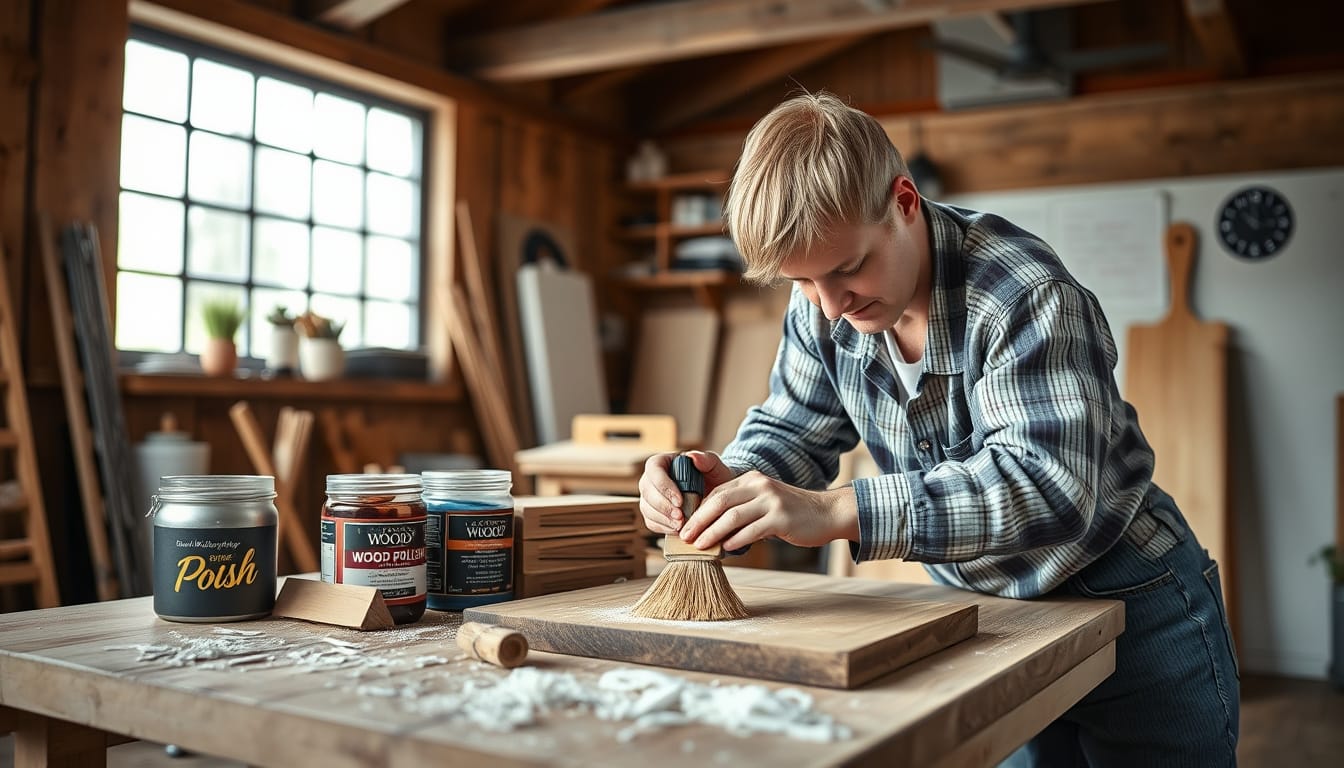
Dip your cloth or applicator into the wax or polish. You want a light coating, not a thick layer. Rub it onto the wood in a thin, even film following the grain direction.
You should barely see the product on the surface. If it looks wet or glossy while applying, you’re using too much.
Visual cue: A properly applied thin coat looks slightly hazy or cloudy. You can see the wood grain through it. There are no puddles or streaks.
Step 3: Let It Haze Properly
After applying, walk away. The product needs time to dry, or “haze.”
For paste wax, this takes 10 to 20 minutes. For liquid wax, 5 to 10 minutes. For spray polish, 2 to 5 minutes.
The surface will look cloudy or white. That’s normal. It means the solvents are evaporating and the wax is bonding.
Visual cue: The hazy stage looks like a thin white film. When you touch it gently with your finger, it should feel dry, not tacky. If it’s still sticky, wait longer.
Step 4: The Buffing Motion That Works
Buffing is where the shine happens. Use a clean, dry microfiber cloth.
Buff in the direction of the wood grain using firm, circular motions. Then switch to straight strokes along the grain. The circular motion removes excess wax.
The straight strokes align the wax particles for a clean finish.
Apply moderate pressure. You’re not trying to polish the wood itself. You’re polishing the wax layer.
Visual cue: As you buff, the cloudy haze disappears, and a clear, glossy shine emerges. The surface should feel smooth, not sticky. If it feels tacky, you didn’t let it haze long enough.
Step 5: Check Your Sheen and Decide If You Need Another Coat
After buffing, step back and look at the surface from different angles.
If the shine is even and the surface feels smooth, you’re done.
If you see dull spots or uneven patches, you can apply a second coat. Wait 24 hours between coats for paste wax. The first coat needs time to fully cure before the second coat bonds properly.
Visual cue: A finished surface shows consistent reflection. Light bounces evenly across the entire piece. There are no matte spots or glossy streaks.
What “Good” Looks Like — The Visual Signs to Watch For
You don’t need a microscope. You just need to know what to look for.
Good:
- Even sheen across the entire surface
- No sticky or tacky spots
- Wood grain is visible and slightly enhanced
- Dust wipes off easily with a dry cloth
- Reflections are clear, not distorted or hazy
Bad:
- Streaks or swirl marks visible in the light
- Cloudy or white patches
- Surface feels sticky or greasy
- Dust clings to the surface within a day
- Fingerprints show easily
Great:
- Warm, rich color with depth
- Smooth as glass to the touch
- Reflections are crisp but not plastic-looking
- Surface feels clean, not coated
If you see any of the bad signs, you either used too much product, didn’t clean properly, or used the wrong product for your finish type. Strip it with mineral spirits and start over.
Common Visual Mistakes (And How to Spot Them)
Even experienced people make these errors. Here’s how to catch them early.
The Sticky Nightmare (Too Much Product)
This is the most common mistake. You apply a thick layer, thinking more equals better protection.
Instead, the excess never fully dries. It stays tacky and attracts dust, lint, and pet hair.
Spot it: Touch the surface 24 hours after polishing. If it feels sticky or leaves a fingerprint, you’ve used too much.
Fix it: Wipe the surface with mineral spirits to remove the excess wax. Let it dry. Reapply a very thin coat and buff thoroughly.
Cloudy or Blotchy Finish (Wrong Polish for the Wood)
You used a lemon oil spray on a lacquered table. Or you applied wax over an oil finish that wasn’t fully cured.
The result is a cloudy, uneven appearance that won’t buff out.
Spot it: The finish looks foggy or milky, especially in indirect light. Buffing doesn’t improve it.
Fix it: Strip the surface with mineral spirits. Let it dry completely. Test your finish type and choose the right product.
White Rings That Won’t Budge
Those white rings from hot coffee cups or sweating glasses aren’t always damage to the wood itself. Often they’re moisture trapped in the finish.
Spot it: The ring is white and slightly raised. It’s on the surface, not in the wood grain.
Fix it: Place a clean cloth over the ring and apply a warm iron for a few seconds. The heat drives the moisture out of the finish. This works on varnish, polyurethane, and lacquer.
It doesn’t work on shellac or oil finishes.
For stubborn rings, use a paste of baking soda and water. Rub gently with a microfiber cloth. Rinse and dry.
How to Fix Three Real-World Problems
Let’s put this into practice with actual situations you might face.
Water Rings on a Dining Table
You hosted dinner last week. Someone set a glass down without a coaster. Now there’s a white ring on your oak table.
What you have: A varnished or polyurethane surface with moisture trapped in the finish.
What to do: Apply the iron trick above. If that doesn’t work, try the baking soda paste. If the ring remains after both, you may need to sand and refinish the spot.
But try the easy fixes first. They work 80 percent of the time.
Prevention: Use coasters. Or apply a fresh coat of paste wax every three months. Wax creates a barrier that moisture can’t penetrate.
Dull, Lifeless Dresser
Your grandmother’s dresser has been in the family for decades. It’s beautiful but flat. No shine.
No depth.
What you have: Likely a shellac or varnish finish with years of wax buildup and dirt.
What to do: Strip the old wax with mineral spirits and #0000 steel wool. Wipe clean. Let it dry.
Apply a thin coat of paste wax. Buff thoroughly.
The difference will be immediate. The grain will pop. The color will deepen.
Prevention: Dust regularly with a dry microfiber cloth. Don’t use spray polishes. Apply fresh wax every six months.
Sticky Residue from Years of Spray Polish
Someone in your house loved that lemon-scented spray. Now the coffee table feels like flypaper.
What you have: Silicone buildup from spray polish on a varnished surface.
What to do: This is the toughest fix. Silicone is stubborn. Use mineral spirits and #0000 steel wool to scrub the surface.
Wipe clean. Repeat until the cloth comes away clean. Then apply paste wax.
It might take three or four rounds. Be patient. The silicone will eventually dissolve.
Prevention: Stop using spray polishes with silicone. Switch to paste wax or a furniture cream without silicones.
How Often Should You Really Polish?
The short answer: every three to six months for most furniture. But it depends on use.
High-use surfaces. Dining tables, coffee tables, and desk tops get handled daily. They need polishing every three months. That keeps the protective wax layer intact and prevents wear spots.
Low-use pieces. Bookshelves, display cabinets, and decorative tables can go six months to a year. They don’t face spills, heat, or constant touching.
Kitchen cabinets. These get grease and steam. Polish them every four months. Use a wax that resists moisture and cleans easily.
Antique or heirloom pieces. Polish them once or twice a year max. Antiques have delicate finishes. Over-polishing can strip the patina or soften shellac.
Here’s the test: run your finger across the surface. If it feels dry or rough, it’s time. If water no longer beads up, the wax has worn off.
If the finish looks dull or flat, polish again.
Don’t polish on a schedule. Polish when the surface tells you it needs it.
When Not to Polish — When You Need Refinishing Instead
Polishing fixes surface problems. It doesn’t fix structural damage. Know the difference.
Polish can fix:
- Light scratches in the finish
- Dull or cloudy appearance
- Water rings trapped in the wax
- Minor dust and grime buildup
Polish won’t fix:
- Deep scratches that reach bare wood
- Chipped or flaking finish
- Water stains that have darkened the wood itself
- Cracked or split wood
- Finish that’s peeling or bubbling
If you see any of those, stop polishing. You need to strip and refinish the piece.
Refinishing means sanding down to bare wood, applying new stain, and sealing with a fresh coat of varnish, polyurethane, or oil. It’s a bigger project. But it’s the only way to fix real damage.
A good rule: if you can feel the damage with your fingernail, polishing won’t help. If it’s just a surface mark, polish might work.
The Verdict: Which Polish Should You Buy?
You don’t need a dozen products. One good paste wax covers most situations.
For varnish, polyurethane, lacquer, and shellac: Use a paste wax made from carnauba and beeswax. Carnauba is the hardest natural wax. It creates a durable, water-resistant layer.
Beeswax adds flexibility and a warm glow.
For oil finishes (tung, Danish, linseed): Use a furniture oil instead of wax. Oil penetrates and nourishes. Wax sits on top and can peel off.
Look for a blend of tung oil and citrus solvents.
For antique pieces: Use a conservation-grade wax with no silicones, no solvents, and no dyes. Restorers recommend microcrystalline wax for museum-quality protection.
Avoid:
- Spray polishes with silicone. They build up and ruin future refinishing.
- Products labeled “lemon oil” that are mostly mineral oil and fragrance. They don’t protect.
- Any polish with color added. It can stain light wood unevenly.
If you only buy one product, get a tin of quality paste wax. It lasts a year or more. It works on almost everything.
And it won’t leave your furniture sticky or cloudy.
Frequently Asked Questions
Can I use olive oil or vinegar to polish wood?
Olive oil goes rancid over time. It leaves a sticky, smelly residue that’s hard to remove. Vinegar is acidic and can dull certain finishes, especially shellac.
Stick to products made specifically for wood furniture.
How do I remove sticky polish residue?
Wipe the surface with mineral spirits and a clean cloth. The mineral spirits dissolve the old wax and silicone buildup. Let it dry completely before applying fresh polish.
You may need two or three rounds for heavy buildup.
Does polishing wood furniture protect it from scratches?
Polishing adds a thin protective layer that resists minor scuffs and light scratches. It won’t stop deep gouges or damage from heavy objects. Think of it as a sacrificial layer.
It takes the hit instead of your finish.
Can I polish wood furniture that’s painted?
No. Paint is a different finish. Polishes and waxes can make painted surfaces look cloudy or greasy.
Use a mild cleaner and a soft cloth for painted furniture. If you want shine, use a furniture polish designed specifically for painted surfaces.
How do I keep my furniture from sliding on wood floors?
That’s a separate issue from polishing. Rugs and rug pads work well. For specific furniture pieces, felt pads under the legs prevent sliding without damaging the floor.
You can find those in any hardware store.
What’s the best way to dust before polishing?
Use a dry microfiber cloth. Don’t use feather dusters. They just move dust around.
Don’t use furniture spray. That’s polish, not cleaner. A dry cloth picks up dust without scratching the finish.