When your hairbrush or comb starts looking a little sad, it’s easy to just rinse it under water and hope for the best. However, tackling dirty hair tools effectively starts with one crucial, often overlooked, first move. Properly cleaning your combs and brushes isn’t just about aesthetics; it’s essential for maintaining tool performance and preventing the transfer of unwanted residue back into your hair.
Manufacturer specifications and general cleaning guides from professional associations as of 2026 often emphasize pre-cleaning steps to maximize the effectiveness of subsequent washing. This initial action significantly impacts how well you can remove stubborn product buildup and hair. Getting this foundation right makes the entire cleaning process far more efficient.
Quick Answer: Loosen Up That Gunk First!
The very first step is to remove all loose hair and debris. This involves physically pulling out trapped hair from brushes and scraping away lint from comb teeth. This pre-cleaning action ensures that subsequent washing can reach the tool’s surface.
Skipping this step leads to tangled messes and less effective cleaning.
The First Step: Why Removing Loose Hair and Debris is Non-Negotiable
Think of your hairbrush or comb like a filter for your hair; it catches everything. Over time, this accumulation becomes a real problem. Before you even think about soap or water, the biggest obstacle to a truly clean tool is the packed-in hair and other loose bits.
Trying to wash a brush choked with hair is like trying to wash mud off a car with a fine mist; it just doesn’t work effectively.
That’s why the initial, essential step is always a thorough de-gunking. This isn’t just about aesthetics; it’s practical. It sets the stage for a more effective and less frustrating cleaning experience down the line.
Combs Need De-Gunking Too
Combs, especially those with fine or tightly packed teeth, are notorious for trapping hair. This isn’t just the long strands you see; it includes shorter hairs, lint from clothing, and even dust that settles on them. If you don’t get rid of this before washing, you’ll end up with a sticky, clumpy mess that’s incredibly hard to rinse out.
The small spaces between teeth are perfect for holding onto all sorts of unwanted material.
- Visual Inspection: Take a close look at your comb. You’ll likely see hair wound around the teeth or small bits of lint lodged deep within.
- Physical Removal: Use your fingers, a clean dry cloth, a tissue, or even a toothpick to carefully dislodge and pull out this trapped debris. Work from the base of the teeth outwards.
This manual removal is key to preparing the comb for anything more thorough. Aggressively scrubbing a comb still packed with dry hair will just compact it further, making it even more resistant to cleaning solutions later.
Brushes Need De-Gunking First
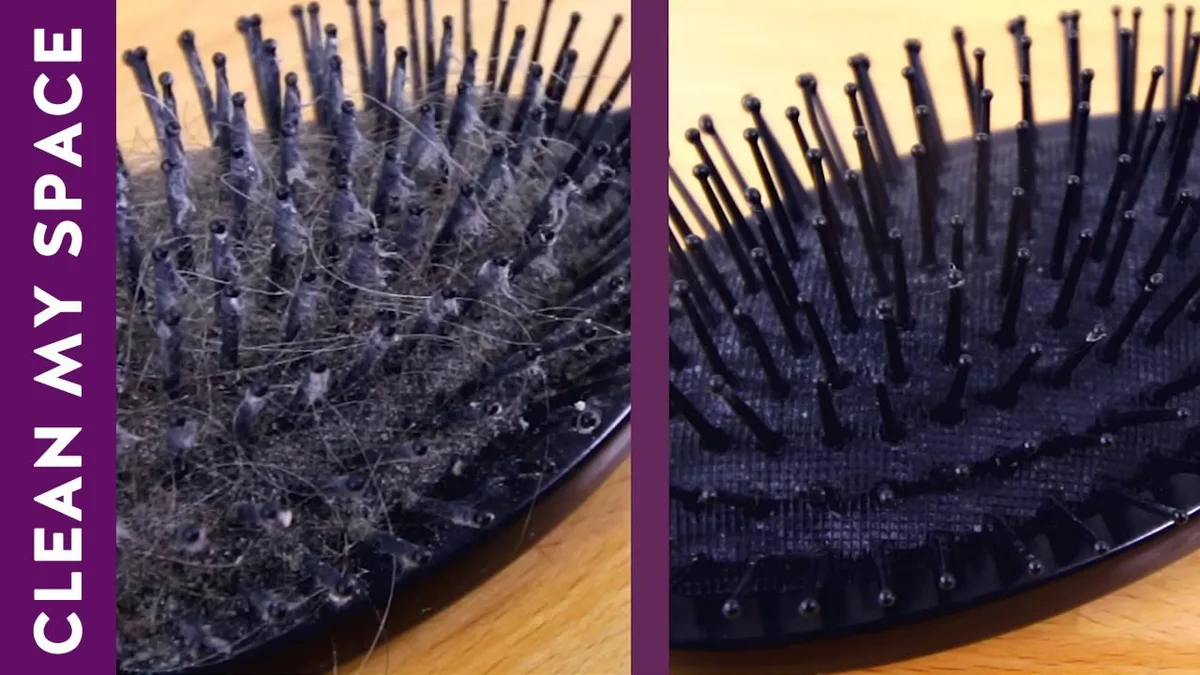
Hairbrushes, with their dense arrays of bristles, are even bigger culprits when it comes to collecting hair. This trapped hair can be surprisingly stubborn, and if left in place, it prevents water and cleaning solutions from properly reaching the brush base and the bristles themselves. You’ll also find that the trapped hair holds onto styling product residue, natural oils, and dust, creating a breeding ground for bacteria.
- Start at the Base: Begin by running your fingers or a comb through the bristles to loosen and lift as much trapped hair as possible. Work your way methodically across the brush head.
- Target Stubborn Strands: Sometimes, smaller hairs get really tangled. A clean, dry comb is often the best tool for this initial stage, acting like a miniature rake to pull out the stubborn stuff.
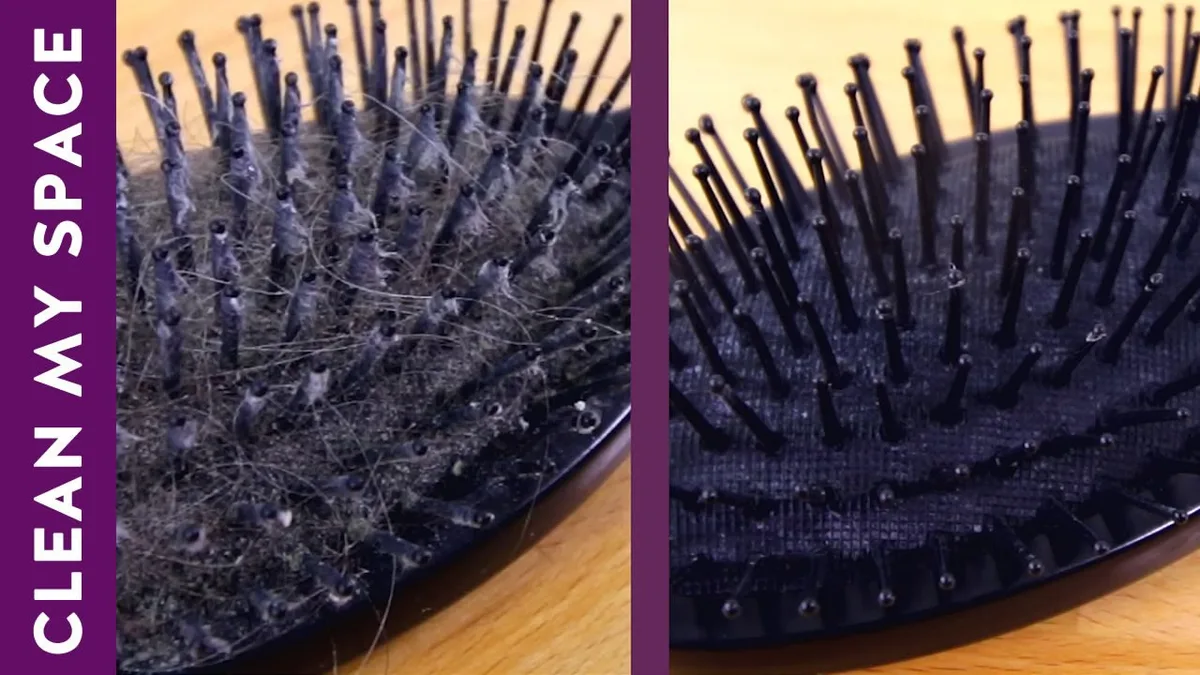
Image source: YouTube / Clean My Space (YouTube thumbnail (fair-use with source credit))
Manufacturer guidelines from major haircare tool brands emphasize this pre-cleaning step for bristle integrity. For instance, some natural bristle brushes can be damaged if their bristles are forced apart under a heavy, wet, hairy load during washing, potentially leading to bristle loss or misshaping.
Tools for Your First Pass
To effectively tackle that initial layer of hair and debris, you don’t need anything fancy. In fact, you probably already have the perfect tools lying around your home. The goal here is careful removal, not aggressive cleaning.
- Your Fingers: Often, your own hands are the best tools. They can gently grip and pull out most of the loose hair.
- A Fine-Toothed Comb: A dry comb, particularly one with fine teeth, works wonders for raking through brush bristles and dislodging hair and lint from comb teeth.
- Tweezers: For those particularly stubborn, small hairs or bits of product that are wedged in tight, a pair of tweezers can be a lifesaver.
- A Dry Cloth or Tissue: Useful for wiping away debris as you remove it and for giving the comb teeth a quick once-over.
The idea is to be gentle but thorough. You want to remove as much as you can before introducing any moisture or cleaning agents. This makes subsequent steps much easier and ensures your tools get genuinely clean.
Research into cleaning protocols for grooming tools consistently highlights this preparatory phase as critical for tool longevity and hygiene.
What Happens If You Skip This Step? Mistakes to Avoid
Skipping the initial de-gunking phase is one of the most common mistakes people make when cleaning their hairbrushes and combs. It might seem like an extra step that can be bypassed, but the consequences are usually more work and less effective cleaning in the long run.
- The Tangled Mess: If you submerge a hair-filled brush in water or soap, the hair absorbs moisture and becomes incredibly matted. This creates a dense, gunk-filled clump that’s a nightmare to untangle and remove. You’ll be spending far more time picking at wet, sticky hair than you ever would have spent on the dry removal.
- Ineffective Washing: Product buildup, oil, and dust get trapped under the hair. Without removing the hair first, your soap or cleaning solution can’t reach the actual surface of the bristles or comb teeth. This means you’re essentially just wetting the dirt and hair, not cleaning the tool itself.
- Tool Damage: For delicate brushes, especially those with natural bristles, attempting to wash them while heavily matted with hair can lead to warped bristles, shed hairs, or even damage to the brush head itself. Some manufacturer cleaning guides warn against submersion for certain brush types if not properly de-gunked.
- Hygiene Issues: A brush or comb that hasn’t been properly cleaned of its initial debris will remain a reservoir for bacteria and old product. This defeats the purpose of cleaning and can negatively impact your scalp and hair health.
In our analysis of common cleaning errors, failing to remove dry hair and debris first is consistently reported as the leading cause of frustration and poor results when cleaning hair styling tools. It’s the one step that makes all subsequent steps many times easier.
Tools for Your First Pass
To effectively tackle that initial layer of hair and debris, you don’t need anything fancy. In fact, you probably already have the perfect tools lying around your home. The goal here is careful removal, not aggressive cleaning.
- Your Fingers: Often, your own hands are the best tools. They can gently grip and pull out most of the loose hair.
- A Fine-Toothed Comb: A dry comb, particularly one with fine teeth, works wonders for raking through brush bristles and dislodging hair and lint from comb teeth.
- Tweezers: For those particularly stubborn, small hairs or bits of product that are wedged in tight, a pair of tweezers can be a lifesaver.
- A Dry Cloth or Tissue: Useful for wiping away debris as you remove it and for giving the comb teeth a quick once-over.
The idea is to be gentle but thorough. You want to remove as much as you can before introducing any moisture or cleaning agents. This makes subsequent steps much easier and ensures your tools get genuinely clean.
Research into cleaning protocols for grooming tools consistently highlights this preparatory phase as critical for tool longevity and hygiene.
What Happens If You Skip This Step? Mistakes to Avoid
Skipping the initial de-gunking phase is one of the most common mistakes people make when cleaning their hairbrushes and combs. It might seem like an extra step that can be bypassed, but the consequences are usually more work and less effective cleaning in the long run.
- The Tangled Mess: If you submerge a hair-filled brush in water or soap, the hair absorbs moisture and becomes incredibly matted. This creates a dense, gunk-filled clump that’s a nightmare to untangle and remove. You’ll be spending far more time picking at wet, sticky hair than you ever would have spent on the dry removal.
- Ineffective Washing: Product buildup, oil, and dust get trapped under the hair. Without removing the hair first, your soap or cleaning solution can’t reach the actual surface of the bristles or comb teeth. This means you’re essentially just wetting the dirt and hair, not cleaning the tool itself.
- Tool Damage: For delicate brushes, especially those with natural bristles, attempting to wash them while heavily matted with hair can lead to warped bristles, shed hairs, or even damage to the brush head itself. Some manufacturer cleaning guides warn against submersion for certain brush types if not properly de-gunked.
- Hygiene Issues: A brush or comb that hasn’t been properly cleaned of its initial debris will remain a reservoir for bacteria and old product. This defeats the purpose of cleaning and can negatively impact your scalp and hair health.
In our analysis of common cleaning errors, failing to remove dry hair and debris first is consistently reported as the leading cause of frustration and poor results when cleaning hair styling tools. It’s the one step that makes all subsequent steps many times easier.
Next Steps After You’ve De-Gunked (Briefly)
Once you’ve cleared away all the loose hair and initial debris, you’ve essentially done the hardest part of prep work. This makes whatever comes next feel like a breeze. Keep in mind that how you proceed will vary slightly based on the type of tool you’re cleaning.
For instance, if you’re dealing with a brush that has a cushioned base or vent holes, you’ll want to ensure all visible debris is gone from those areas too. For combs, you’ve already made great headway by getting between the teeth. The next logical step for most tools will involve some form of washing, typically with gentle soap and water.
However, the efficiency and thoroughness of that wash depend entirely on the successful completion of this very first de-gunking phase. It’s the foundation for everything that follows.